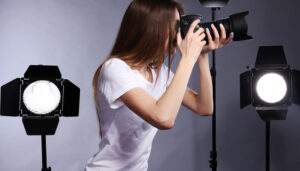
Fashion photography isn’t simply about clothes. It’s about atmosphere, texture, confidence, and conveying a tale. Lighting is the most important thing that shapes that story.
Even with great style and a competent model, bad lighting can make them look flat. The correct light, on the other hand, can turn a plain clothing into a high-end campaign photo.
Here are five basic studio lighting settings that every fashion photographer should know how to use to improve their fashion photography lighting skills.
1. Butterfly Lighting (The Classic Beauty Setup)
Let’s start with the most famous type of photography: butterfly lighting.
How it works:
- Put the main light right in front of the model
- Put it a little higher than your eyes
- Point it down toward the face
The term comes from the fact that this makes a little shadow under the nose that looks like a butterfly.
Why It’s a Trend in Fashion:
- Brings out the cheekbones
- Defines the jawline
- Makes the face look more balanced
- Great for photos of beauty and glitz
This lighting is great for beauty ads and magazine photos.
2. Rembrandt Lighting (Dramatic Look for Editorials)
Rembrandt lighting is strong if you want to set a mood and add depth.
Setup:
- The main light is set at a 45-degree angle to the subject
- A little over eye level
- Makes a triangle of light under the eye on the side that is in the shadow
What it does:
- Adds depth
- Makes a big difference
- Great for editorials in high fashion
This method is often employed in artistic fashion photography to give stories more depth.
3. Soft and flattering clamshell lighting
People who work in fashion and beauty love clamshell lighting.
How to set up:
- One important light above the subject
- A light or reflector that is below the face
The term comes from the fact that the two lights “clamp” the face.
Why It Works:
- Lessens harsh shadows
- Makes skin feel soft
- Perfect for advertising on beauty and skin care
This is one of the best ways for beginners to set up studio lights because it always gives good results.
4. Split Lighting (High-Impact Fashion Drama)
There are two half to the face when you use split lighting: one is lighted and the other is in shade.
How to Set Up:
- Light that is put right next to the model.
- Makes a strong line down the middle of the face.
Best For:
- Fashion editorials that are bold
- Conceptual photoshoots
- Styling with dark tones
It adds mystery and depth, which is great for fashion themes that are bold and edgy.
5. Three-point lighting (even and professional)
Three-point lighting is a basic part of both photography and video making.
Setup includes:
- Main source of light
- Fill light (makes shadows less harsh)
- Backlight (makes the subject stand out from the background)
Why It’s Important:
- Adds depth
- Keeps things from being flat
- Adds a professional touch
Many businesses use this setup in their lookbooks and ads.
When you master this, your work will be instantly better.
Why Knowing How to Use Light Is Important in Fashion
Texture is what fashion is all about.
The direction and strength of light affect how fabric shines, skin tone, and contour definition.
You can do the following if you know how to use lighting in fashion photography:
- Control where the shadows go
- Show off the details of the clothing
- Make mood on purpose
- Improve the quality of production
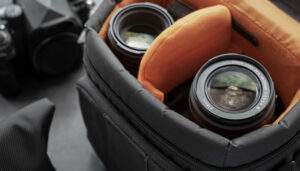
Even costly cameras won’t give you professional pictures if you don’t have lighting control.
Things Beginners Shouldn’t Do
A lot of photographers make these mistakes:
- Putting lights too low
- Using a harsh direct flash
- Not paying attention to the background illumination
- Too much light on skin highlights
- Not thinking about shadow balance
Learning how to use structured lighting can help avoid these problems.
Exercise for Practice
To boost your confidence:
- Begin with butterfly lighting.
- Use Rembrandt lighting to take pictures of the same model.
- Look at the patterns in the shadows.
- See how quickly the mood shifts.
- Lighting tells a narrative.
Small changes can make a big difference.
Why structured training is helpful
It’s one thing to read about lighting. Using it is a another story.
You can learn by doing things with the support of a professional, like in a fashion photography courses in kolkata.
- Where to put the light
- Using modifiers
- Reflectors vs. softboxes
- Lighting ratios
- How studios work in real life
You have to practice and fix things over and over again to master lighting.
Conclusion
You can’t go without mastering these five setups if you want to be a successful fashion photographer:
- Butterfly lighting
- Rembrandt lighting
- Clamshell lighting
- Split lighting
- Three-point lighting
These aren’t just techniques; they’re instruments for being creative.
You can regulate emotion, impact, and professionalism better the more you can control light.
Light isn’t just light in fashion photography.
It’s all about attitude.