Lighting can make your photograph look excellent or totally ruined. Your camera quality and its price do not matter when the lighting is bad in a photograph. That is the reason photographers pay extra attention to light conditions.
Golden and blue hours of the day provide the most beautiful light for photography. As a beginner, if you can master these two lighting conditions, you can take outstanding photographs.
This blog will talk about golden hours vs blue hour photography, how to take better pictures in these lighting conditions, and the right time.
What is Golden Hour?
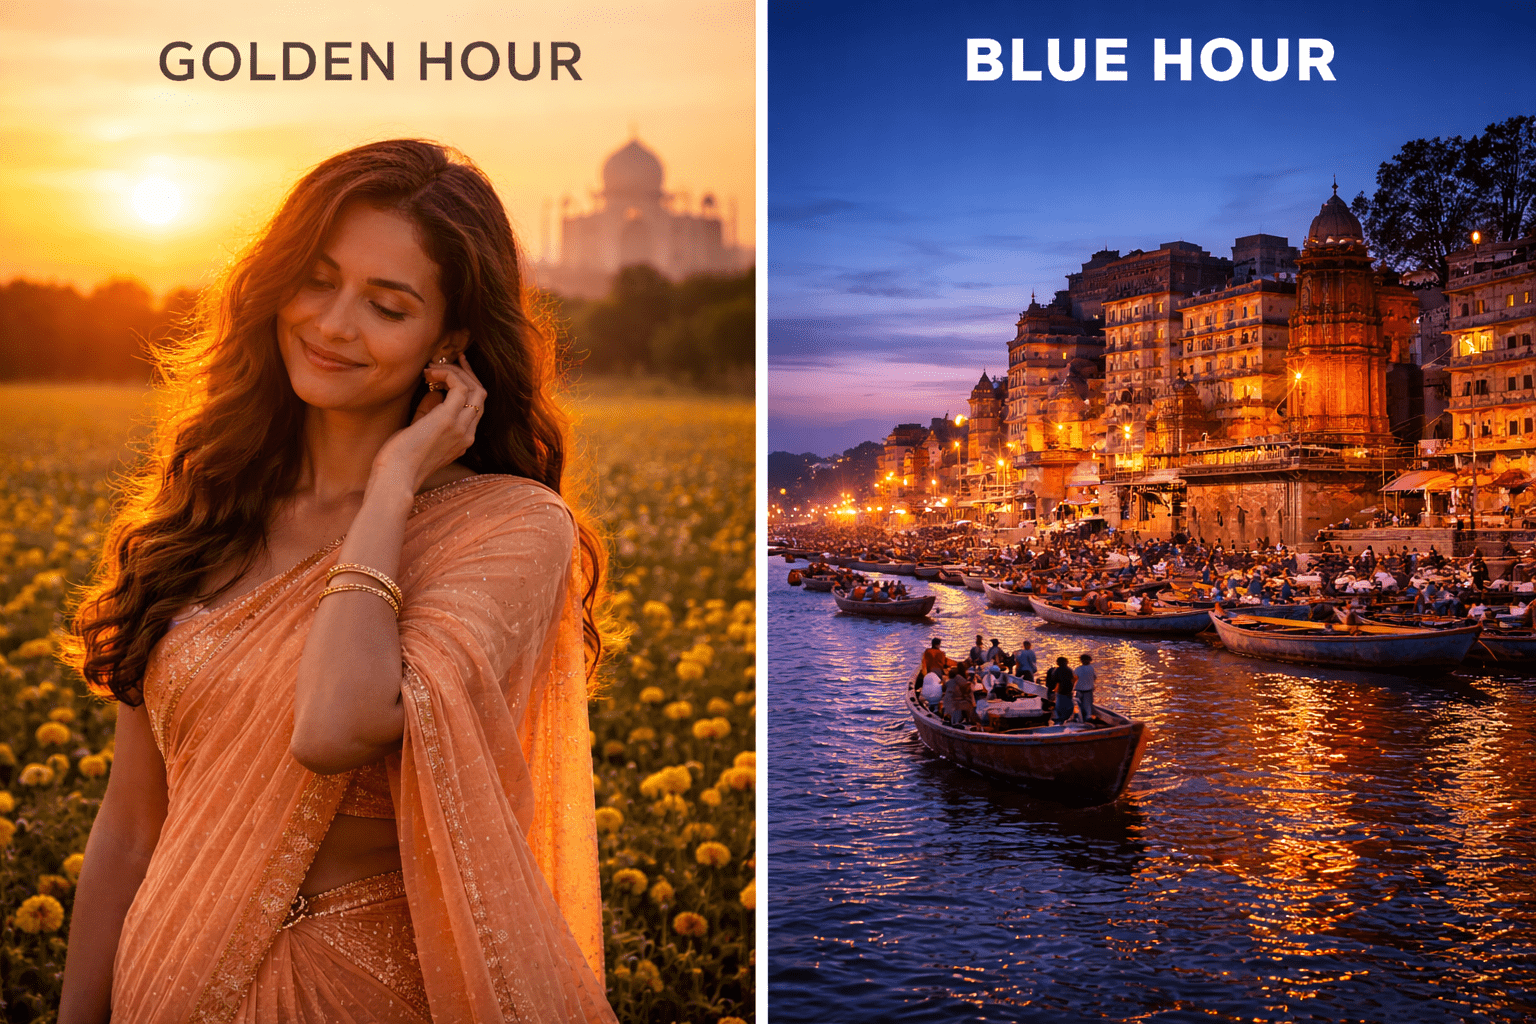
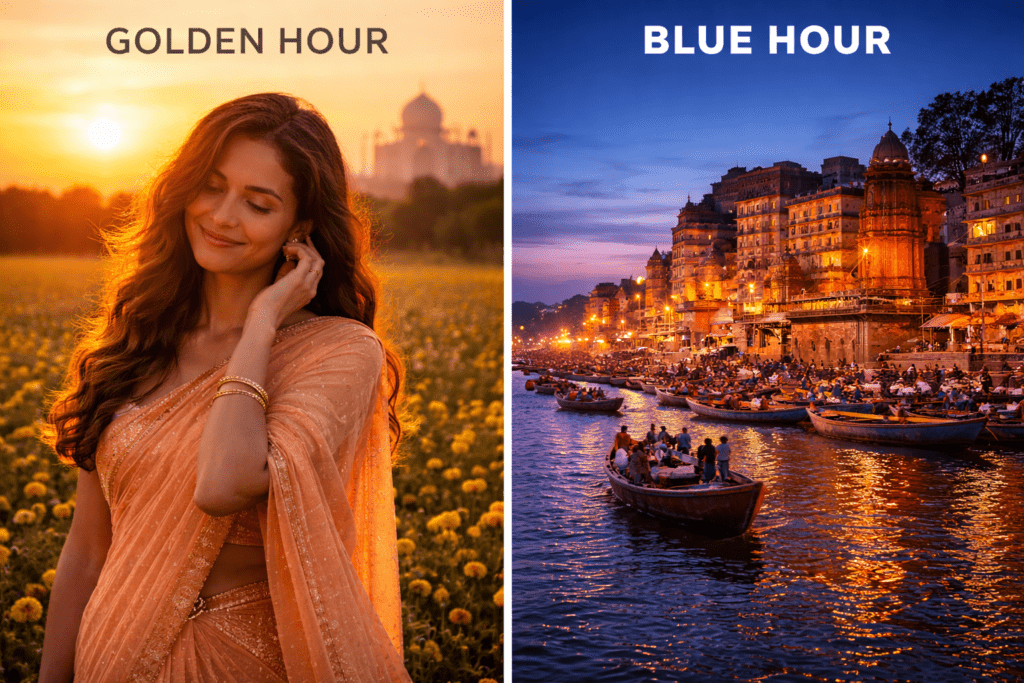
Golden hour is short; you will only get two chances to catch the light in a day. These times are just after sunrise and just before sunset. You will get warm and soft natural lighting during golden hours.
Key benefits:
- Get golden, yellow, and orange warm tones in your photographs.
- Natural glow on your subject and landscape
- Shadows are reduced and better contrast
- Better lighting for portrait shots
Golden awards give your photo a cinematic and emotional touch. A skilled photographer can take epic photographs during this phase.
What is Blue Hour?
You will get blue hours just before sunrise and just after sunset. In blue hours, the sky becomes deep blue and gives a moody yet calm environment.
Key outcomes:
- You get a diffused light evenly spread in the environment
- Carries a blue and cool tone
- Good for cityscape shooting
- No harsh shadows
The blue hour feels dramatic and captures cityscapes very well with a cool tone. Hence, most professional photographers prefer blue hours for architecture shooting.
Key Differences Between Golden Hour and Blue Hour Photography
If you want to choose between golden and blue hours, you will have to know the different characteristics of these two hours. The information will help you to choose between two types of lighting based on your photography needs.
An idea about golden vs blue hour photographs
Key differences:
| Features | Golden hours | Blue hours |
| Tone of light | Warm golden or warm orange | A cool bluish tone |
| Good for | It is best for portraits and landscape photos | Good for shooting cityscape |
| Sky colour | The key becomes bright and glowing | A deep blue appearance |
| Shadows | You get soft and long shadows | Almost non-existent |
| Overall mood | Romantic, soft and lovely mood | Cool, cinematic and dramatic mood |
Specific Golden Hour Timing for Photographers
Golden hour light stays for less than an hour. Moreover, if you are shooting in winter, you will get less time. The location also plays a major role in golden hour timing.
- In the morning, at times of sunrise, you can get about 30 to 60 minutes of golden hours.
- During sunset your will get approximately 1 hour of golden lights
All the it is a rough estimation; if the sky is cloudy, you will not find any Golden light. For instance, in cities like Kolkata, humidity and population can affect the magical tone of the golden light.
Hence, if you are beginning your photographic area and want golden hour lights, then take the help of weather apps.
What is the Best Time for Outdoor Photography?
The best time depends on your subject. Golden hour works great for portraits. It also suits landscapes and nature shots. Blue hour is perfect for city photography. It balances artificial and natural light. Neither daylight nor darkness offers this.
Magic Hour Photography Tips
Timing alone will not guarantee great shots. Here are some simple, helpful tips.
Use apps to track the light. PhotoPills and Golden Hour One work well. Arrive at least 20 minutes early. Set up your gear before the light.
Always bring a tripod with you. Blue hour needs longer exposure times. A tripod keeps your images sharp. It also helps during golden hour shoots.
Set your white balance correctly always. Golden hour needs 5500K to 6500K. Blue hour works at 3200K to 4500K. This preserves each hour’s natural tone.
Bracket your exposures every single time. Light shifts fast during both hours. Three shots at different levels help. You will always get one good frame.
Some Creative Ideas
Try silhouettes during golden hour shoots. Face your subject toward the sky. Expose for the bright background instead. You get a dramatic, warm result.
Try long exposures near water sources. Rivers and shores look silky smooth. Use a 10 to 20 second shutter. Blue hour light makes this work perfectly.
Capture light trails in the city. Blue hour skies look deep and rich. Set your shutter to 20 seconds. Watch the car lights streak beautifully.
Look for reflections around you always. Puddles, lakes, and glass buildings work. They mirror golden and blue tones. These shots always look stunning and unique.
Becoming a Better Photographer
Practice during these hours every week. Great photographers always scout locations beforehand. Visit your spot during the daytime. Find your angles before the light arrives.
You can also learn from experts. Advanced photography classes in Kolkata offer guidance. Skilled photographers teach golden and blue hours. You gain hands-on, real-world experience there.
Lighting is the Most Powerful Tool in Photography
No filter can replace natural light. No camera body costs enough to substitute. Golden and blue hours are truly special. They happen twice every single day.
Golden hour adds warmth and softness. Blue hour brings drama and cool depth. Together, they cover every photography mood. Every genre benefits from these two hours.
Your job as a beginner is simple. Show up early and stay patient. Practice sharpens your eye over time. You will learn to read light naturally.
Carry your camera and chase light. That is where great photography starts.