Do you sometimes feel stuck as a photographer? Somewhere down the line, you miss that one “WoW” factor in your own clicks. Well, you are not alone, people involved in photography as a hobby often face a lack of ideas.
A daily photography practice plan can help you to transform yourself from an amateur hobbyist to a professional photographer. It’s not about expensive tools and gadgets; it’s just about consistency.
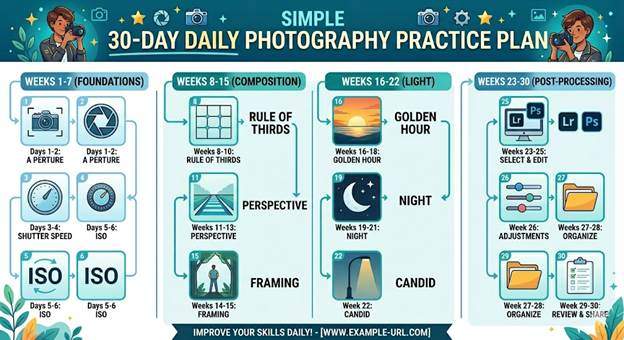
A daily photography practice plan can help you to improve your photography skills fast. So you will need a 30-day routine practice instead of just occasional weekend shoots. This training will improve your vision about minute moments, lights and composition that amature photographs miss during a shoot.
This is a guide for a 30-day plan to master photography.
Part 1: Understand The Technical Fundamentals (Days 1 to 10)
Your camera and its settings are the fundamentals of basic photography. So, in the first 10 days, we will focus on how to practice photography daily. In this course, you get to learn all the manual settings.
Depth & Aperture of Field (Day 1 to 2)
First, you will have to learn about the f-stops. Therefore, start shooting the same subject at different f-Stops for the first three days of your photography practice plan. Hence, you will learn how f/1.8 gives your subject a “bokeh” effect with a blurry backdrop, and how f/16 helps to keep each factor sharp.
Understand Motion & Shutter Speed (Days 3 to 4)
Explore your neighbourhood to find subjects in motion. For instance, you can visit a park or a busy street to understand the game of shutter speed and motion in photography.
For example, try taking a picture with a fast shutter speed of 1/1000s. This speed can freeze a runner. Apart from that, you may also test the slow shutter speed of 1/10s to understand the technique of motion blur in photography.
ISO & Grain (Days 5 to 6)
Take your time in understanding low-light shooting. This will help you to realise how far you can increase ISO for a particular photograph in a low-light environment. Do check the point when extreme ISO creates “noise” that ruins your image.
You will get an important idea about the ISO adjustment from this practice.
Mastering Exposure (Days 7 to 10)
After mastering all three factors above, take 10 to 15 photos of different subjects in various settings. Additionally, take low-light photos where your lighting meter shows “zero light”, then adjust it manually. Thus, you will complete your first phase of professional photography.
Part 2: Develop an Artistic Eye to Catch Each Composition (Days 11 to 20)
You can start the second phase after mastering the manual and technical factors well. Now lets focus on frames to bring a visual change. Explore daily photo challenge ideas to change your view of the world around you.
Learn Rule of 3rd (Day 11)
You have to experiment with different angles, for example, try taking photos where your subject is at a third angle of your frame. For example, take 20 photos with the subject in your frame’s left third, then do the same for the right third.
Leading Lines (Day 12)
Master the role of focal point in photography. You can find roads, shadows, or fences to guide the focal point for your viewers.
Shape & Geometry (Day 13)
Shoot natural objects with different shapes and sizes. For instance, circle, triangle, and square. Additionally, try to keep the frame clean and sharp.
Work on Frame within a Frame (Day 14)
Try to shoot your subject through a frame, like a doorway or a window. This will add a unique effect to your photograph.
Change Perspective (Days 15 to 17)
You can go for different levels of photoshoots. For example, try taking 50 plus photos without going for eye level. Click your picture from ground level, or you can climb to take photos from above.
Black and White (Days 18 to 20)
You can go for a RAW and B&W photo shoot. Hence, turn off the colour viewfinder on your camera and try to capture photos of your subject through shadow, texture and contrast.
Part 3: Lights, Visual Storyline, and Editing (Days 21 to 30)
Learn to add “emotion” and “final look” to the ending part of your daily photography practice plan.
Chase Light (Days 21 to 23)
Go for the golden light during dawn and dusk. Here, you need to learn how warm light and long shadows change the look of your soundings and subject.
Build a Candid Visual Story (Days 24 to 26)
Learn to capture important moments in public. For example, joy, laughter, gestures and ongoing interaction between people. As a result, your photographs will express hidden stories and emotions.
Macro and Details (Days 27 and 28)
Capture beauty in subjects with macro and detailed photographs. For instance, the veins of a leaf, or the fabric texture of a piece of cloth.
Editing (Day 29)
Select one of your captured photos and take your time to edit it according to your vision. Take a note of the colour profile, masking, and curvatures to express your vision.
Look into the Portfolio (Day 30)
Select 4 to 5 of the best pictures you have captured during the last 30 days, and analyse why they are the best. Such an analysis will help you to identify your strengths and weaknesses in photography.
Practice Hard and Take Your Photography Skills to a Professional Level
This 30-day journey will help you to become a professional photographer from being a hobbyist. This will kick-start your interest in photography. If you fall in love with photography and want to make it a full-time profession, then going for a structured assistance is the most logical step.
If you are from India, you can take a professional photography diploma course in Kolkata. You will get industry-standard training in studio lighting, expensive equipment handling, and expert training that you cannot learn from YouTube videos.
Inspirations and Idea
The reason your current photographs feel dull and miss the “Wow” factor is a lack of inspiration. Professional photographers find inspiration while shooting. The daily photography practice plan will help you to overcome the dilemma of “what to shoot?” in a decisive way.
Just remember:
- To always keep your camera with you
- If you are not getting any innovative ideas, then call it a day. Don’t push it.
- Don’t instantly delete a photo. Judge it well while editing to evaluate each detail.
These techniques will help you to change your vision and the way you look at your surroundings. Hence, you will become a good photographer.