You’re not the only one who bought a DSLR and still shoots in Auto mode.
Auto mode makes you feel comfortable. The camera makes all the choices. All you have to do is push the shutter.
But here’s the truth: If you stay in Auto, you’re not being creative.
It’s not about being “professional” to learn manual mode. It’s all about control. Your photography changes radically when you learn how to use the manual settings on your DSLR.
This is your step-by-step instruction to taking pictures in manual mode that is easy for beginners.
Why Use Manual Mode?
Before we go into the settings, let’s tackle the main question: why should you shoot in manual mode?
You can control things in manual mode:
- Light
- Field of depth
- Blur from movement
- Mood of the image
- Creative purpose
The camera tries to guess what you want in Auto mode.
You make the choice in Manual mode.
And making choices is what photography is all about.
Step 1: Learn about the Exposure Triangle
There are three main parts to manual mode:
- Opening
- Speed of the shutter
- ISO
They work together to control exposure.
Think of them as three knobs that keep things in balance. If you change one, the others have to change too.
Step 2: Learn the f-number first (Aperture)
Aperture controls:
- How much light gets in
- How out of focus the background seems
Less light (f/1.8, f/2.8) equals ✔ More light ✔ More background blur
More light (f/8, f/11) = Less light and a sharper backdrop.
Try f/1.8 or f/2.8 if you’re taking pictures of people.
For landscapes, use f/8 or higher.
Beginners don’t know that aperture has a bigger effect on mood than they think.
Step 3: Change the shutter speed
Controls for shutter speed:
- Blur from motion
- Sharpness
Fast shutter (1/500, 1/1000): ✔ Stops motion
Slow shutter (1/30, 1/10): ✔ Makes things look blurry when they move
Your shutter speed is probably too slow if your pictures look blurry when they shouldn’t.
If you’re just starting off, keep it above 1/125 for handheld images.
Step 4: Be careful when setting ISO
ISO controls how sensitive light is.
Low ISO (100–200): ✔ Clear picture ✔ Less noise
High ISO (800–3200): ✔ Image is brighter in poor light ✖ More grain/noise
Always keep the ISO as low as it can go while still getting the right exposure.
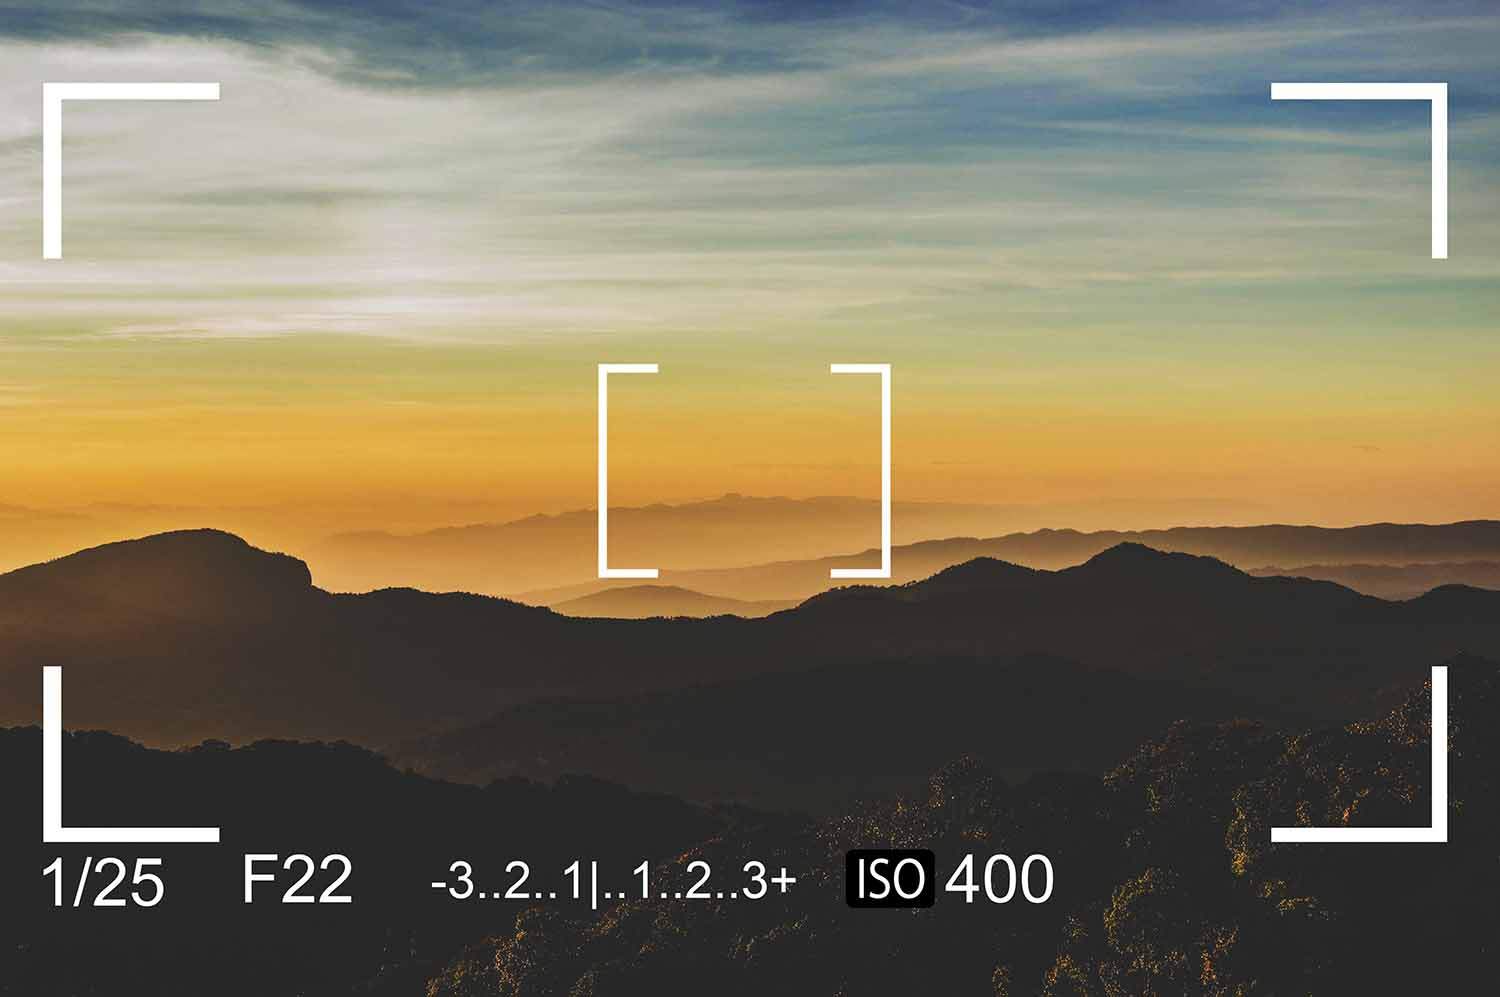
Step 5: Turn on the light meter
There is a light meter scale inside the viewfinder of your DSLR:
- -2 | -1 | 0 | +1 | +2
Try to maintain it close to 0 for balanced exposure.
If the meter displays underexposed (-), add more light with:
- Lower f-number
- Shutter speed is slower.
- ISO is higher
If the picture is too bright, lower the brightness.
In manual mode, this meter is your best friend.
Step 6: Use this simple formula to get started.
This is a safe place to start during the day:
- Aperture: f/5.6
- Speed of the shutter: 1/200
- ISO: 100
After that, make changes based on how bright it is and what it is.
Do this over and over. Repetition makes manual mode easier.
Common Mistakes Beginners Make in Manual Mode
- Changing all three settings at random
- Not paying attention to shutter speed safety constraints
- Raising the ISO too much
- Not checking the white balance
- Getting scared when the exposure appears wrong
Keep in mind that every mistake teaches you something.
Manual Mode Gives You Confidence
The more you use manual mode, the more you learn:
- What light does
- How settings work together
- How to manage the results of your creativity
You don’t rely on luck anymore.
You begin to guess what will happen.
That’s when you start taking pictures on purpose.
Why it’s important to learn manual mode the right way
You can watch a lot of videos about how to utilize manual settings on a DSLR, but if you don’t practice in a disciplined way, you’ll get confused quickly.
That’s why a lot of serious novices opt for photography courses in Kolkata that teach them about exposure, lighting, and practical shooting exercises step by step.
When someone teaches you how to use manual mode in real life, it becomes less terrifying.
Conclusion
Auto mode is useful.
Manual mode gives you power.
Stop letting the camera make decisions for you if you want to get better at taking pictures.
Try new things. Do things wrong. Change the parameters. Look at the light.
You aren’t just shooting images anymore once you know how to use manual mode.
You are making them.