It might be hard to shoot in low light, especially for beginners. Your pictures come out blurry, grainy, or too dark, and it looks like you need to buy expensive gear to repair them. But the truth is that good low-light images come from how you take them, not what you use. You can take beautiful pictures even when it’s dark if you make a few easy changes and practice.
These guidelines are easy to understand and can help you take pictures with confidence in low light, whether you’re learning on your own or planning to take photography courses.
1. Slow Down Your Shutter Speed
The shutter speed controls how long the sensor in your camera is exposed to light. Slowing down the shutter speeds lets in more light when it’s dark, making your picture brighter.
Try this:
- Start with 1/60 sec
- Go slower if needed (1/30, 1/15)
- Keep your hands steady to avoid blur
The slower the shutter, the more likely you are to get motion blur. Unless you steady your camera, that is.
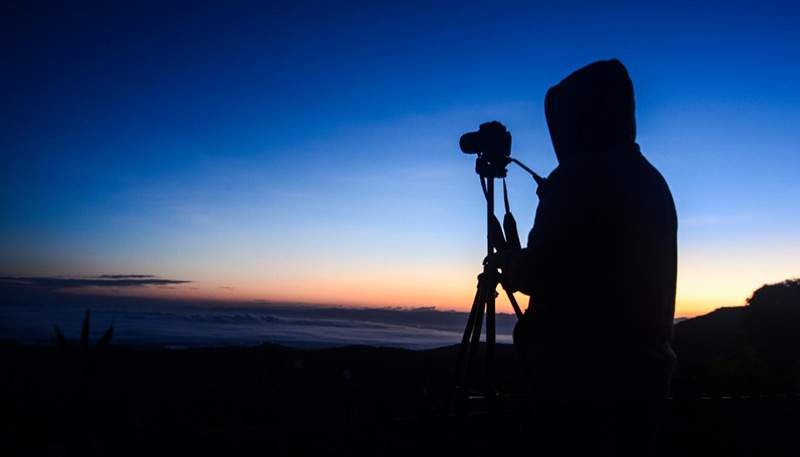
2. Use a Tripod or Stabilize Your Camera
Steadiness is everything in low light.
If you don’t have a tripod, use:
- A table
- A chair
- A wall
- A backpack
Stabilizing your camera helps maintain photographs clear even when the shutter speed is sluggish and stops your fingers from shaking.
3. Increase Your ISO (With Care)
ISO tells your camera how sensitive it is to light. Higher ISO values make your picture brighter, but they can also add noise (grain).
General ISO guidelines for beginners:
- Indoor low light: 800–1600
- Night street photos: 1600–3200
- Very dark scenes: 3200–6400
Don’t be afraid to try new things with high ISO because modern cameras work better with it.
4. Use a Wide Aperture (Low f-number)
A bigger aperture, such f/1.8 or f/2.8, lets in more light and makes the background look blurry.
Lenses to try:
- 50mm f/1.8 (budget-friendly and great for beginners)
- Kit lens at its lowest f-stop (f/3.5–5.6)
Wider aperture = brighter photos + sharper subject.
5. Find and Use Available Light Sources
There is still light, even if it’s low. Look around.
Use:
- Street lamps
- Shop windows
- Neon signs
- Household lamps
- Candles
- Car headlights
These can make your pictures more dramatic, deep, and interesting.
6. Avoid Using Direct Flash
The built-in flash often makes the light too harsh and flat, which spoils the mood.
Alternatives:
- Bounce your flash off a wall
- Use a diffuser
- Increase ISO instead
- Use soft ambient light sources
For portraits and indoor scenarios, soft light always appears nicer.
7. Shoot in RAW Format
RAW files have more information than JPEGs, which lets you change the exposure, shadows, and noise while you edit.
Shooting in RAW is extremely useful when the light is low and you need to make changes.
8. Use Exposure Compensation
Change the exposure adjustment to +0.3, +0.7, or +1.0 if your pictures are too dark.
This lets the camera brighten the picture without having to go into full manual mode.
9. Lock Focus or Use Manual Focus
In low light, cameras have a hard time focusing. Your lens might “hunt” back and forth.
How to fix it:
- Focus on a well-lit object
- Use your camera’s focus assist beam
- Switch to manual focus if it’s too dark
For shooting in low light, sharp focus is really important.
10. Experiment With Long Exposure Photography
Long exposure makes artistic effects like:
- Light trails from cars
- Smooth flowing water
- Star trails
- Glowing cityscapes
Start with:
- Shutter speed: 1–5 seconds
- ISO: 100–400
- Tripod: essential
This is one of the most interesting parts of low-light photography.
11. Use the Histogram (Not Just the Screen)
When it’s dark, your camera screen can be wrong. The histogram shows you if your picture is too dark or just right.
You want a histogram that isn’t pushed all the way to the left (too dark).
12. Edit Your Photos to Reduce Noise
There may still be some noise in a well-taken photo taken in low light.
Use apps like:
- Lightroom
- Snapseed
- Photoshop
Adjust:
- Noise reduction
- Exposure
- Shadows
- Contrast
This gives your pictures a clean, professional look.
13. Practice Often and Observe Light
The finest photographers who work in low light are those that practice and watch.
Learn to notice:
- Where light falls
- How shadows change
- Which angles brighten the subject
- How artificial lights affect skin tones
You quickly gain confidence when you practice hands-on, like in photography courses, because you learn how to control things in real-life situations.
Bonus: Quick Low-Light Checklist
✔ Slow shutter speed
✔ Keep your camera steady
✔ Increase ISO (carefully)
✔ Use a wide aperture
✔ Find extra light sources
✔ Avoid direct flash
✔ Shoot RAW
✔ Check your histogram
✔ Edit for noise and brightness
With these essentials, you can shoot with confidence even when it’s dark.
Conclusion
You don’t need expensive gear to take pictures in low light; you simply need to know how to use your camera and be creative. When you know how to change the shutter speed, ISO, and aperture, taking pictures in the dark becomes a fun challenge instead of a pain.Joining one of the photography courses in Kolkata will help you learn low-light techniques by giving you hands-on experience and professional feedback if you really want to learn them.