Understanding light is more important for great photography than owning the newest camera or lens. An everyday scene can become extraordinary with the help of light. One of the most crucial first stages to becoming a better photographer is knowing how to successfully control and use light.
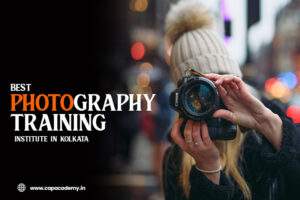
Learning the fundamentals of lighting will instantly improve your images, whether you’re taking the best photography course in Kolkata or learning on your own.
Let’s examine easy and efficient lighting techniques that all novices should be aware of.
1. Use Natural Light Wisely
The simplest and most readily available light source for novices is natural light. Learning how to use it is crucial.
Golden Hour
Soft, warm, and attractive light can be found an hour after sunrise and an hour before dusk. Colors are deeper and shadows are subtle.
Avoid Harsh Midday Sun
Strong shadows and overexposed highlights can result from shooting between 11 a.m. and 3 p.m. Look for shade if you have to shoot at noon.
Window Light
When taking portraits, position your subject close to a window that lets in diffused light. You’ll get lovely skin tones and gentle shadows, which are ideal for indoor photos.
2. Understand the Direction of Light
An image’s depth and mood are altered by the direction of the light.
Front Lighting
The subject is immediately in front of the light.
Because it lessens shadows, it’s ideal for novice portraits.
Side Lighting
The subject is illuminated from the side, which is ideal for adding depth, drama, and texture.
Perfect for portraits, food, and product photography.
Backlighting
Light comes from behind the subject.
Great for:
- Silhouettes
- Glowing hair (rim light)
- Sun flare effects
Once mastered, backlighting produces beautiful images, but it takes practice.
3. Use Reflectors to Control Light
Reflectors help fill in shadows by reflecting light back onto your subject.
You can use:
- A white chart paper
- Aluminum foil
- A professional reflector
Common reflector colors:
- White: Soft, natural fill
- Silver: Bright, cool-toned fill
- Gold: Warm, sunset-like glow
Reflectors are ideal for window-light settings and outdoor photos.
4. Master the Basics of Shadows
Uncontrolled shadows can spoil a picture, but they also give it depth.
To soften shadows:
- Bring your subject closer to the source of light.
- Make use of diffusers (softbox, tracing paper, curtain).
- Use a reflector to bounce light
To add drama:
- Use strong directional light
- Increase contrast
- Position your subject diagonally to the light source
The best photography course in Kolkata teaches pupils the importance of understanding shadows and how they impact mood and narrative.
5. Practice Using Artificial Light
Investigate artificial lighting once you are at ease with natural light.
LED Lights
Great for inside shooting, portable, and reasonably priced.
On-Camera Flash
useful in low light, but if focused directly, it can appear harsh.
External Flash / Speedlight
More adaptable than integrated flash. For softer effects, you can reflect light off ceilings or walls.
Softboxes
Produce even, gentle light that is ideal for interviews, products, and portraits.
Ring Light
Excellent for vlogging, close-ups, and beauty shots.
6. Bounce Your Flash for Softer Light
Harsh, unattractive shadows are frequently produced by direct flash. To lessen the flash, bounce it off of the following:
- Ceiling
- Walls
- Reflective boards
This creates indirect, diffused light that looks more natural.
7. Use Diffusers for Soft Lighting
Diffusers lessen harshness and distribute light uniformly. You may utilize:
- Softbox
- Umbrella
- White bedsheet
- Tissue paper over a flashlight (beginner hack)
For indoor photography, baby picture shoots, and portraits, soft lighting is ideal.
8. Learn the Inverse Square Law (Made Simple)
The light gets softer and brighter the closer the light source is.
It gets harsher and dimmer the farther away it is.
Thus, keep the light close for gentle portraits. Move the light farther away to create dramatic shadows.
9. Try Creative Lighting Techniques
Here are a few entertaining techniques to try:
Silhouette Photography
Put the subject in front of a bright light source.
Low-Key Photography
For gloomy, moody photos, use as little light as possible.
High-Key Photography
Multiple lights are used to create bright, low-shadow images.
Rim Lighting
To generate a glowing border around your subject, use backlight.
The best photography courses in Kolkata often incorporate these methods into their curricula, teaching students how to use imaginative lighting to enhance their images.
10. Study Lighting in Movies and Portraits
Take note of how directors employ light direction, highlights, and shadows to create atmosphere.
Learn useful lighting setups by watching photo shoots, interviews, and behind-the-scenes videos.
Bonus: Beginner Lighting Mistakes to Avoid
- Taking pictures in direct sunshine without any shade
- Directly flashing faces
- Failing to look for shadows beneath the eyes or chin
- Keeping the light too far away
- Disregarding the ambient lighting
- Not striking a balance between artificial and natural light
Correcting these faults can instantly improve your images.
Conclusion
The core of photography is lighting. Knowing how light functions will change your photos, whether you’re using a DSLR or a smartphone. Expensive equipment is not necessary; all you need is practice, observation, and the appropriate methods. Enrolling in the best photography course in Kolkata may provide you with practical instruction, immediate feedback, and a polished learning atmosphere if you’re serious about becoming an expert photographer.