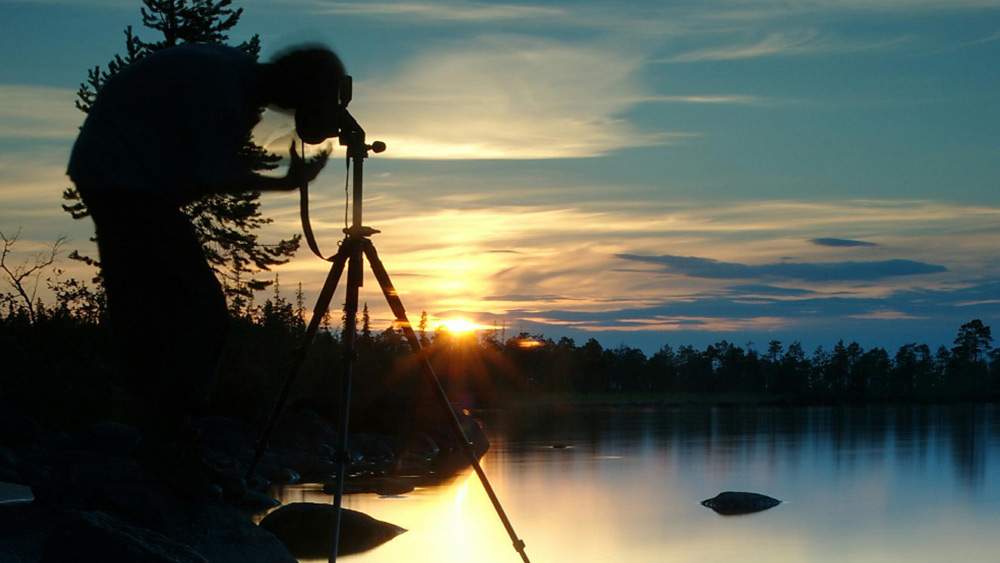
Lighting is the single most important factor that distinguishes a mediocre photograph from a spectacular one. Knowing how light behaves may revolutionize your photography, whether you’re doing product pictures, landscapes, or portraits.
Actually, a lot of students who sign up for the best photography course soon discover that the key to excellent photography is understanding lighting, both artificial and natural.
This book will teach you the fundamentals of photography lighting and how to use light creatively in any setting if you’re a novice wondering how to make your images appear more professional.
Why Lighting Matters in Photography
Consider light to be the photographic language. It essentially shapes the how your image feels by determining its color, texture, contrast, and mood.
The way light interacts with what you see is just as important as what you can see in a shot. The story your photograph conveys can be significantly altered by the light’s direction, quality, and color.
- Soft light creates calm, flattering portraits.
- Harsh light adds drama and contrast.
- Golden-hour light (early morning or late afternoon) brings warmth and magic.
Therefore, the true secret to shooting great pictures is to understand how to see and control light before you concentrate on camera settings or editing techniques.
Understanding Natural Light
Sunlight is the most potent and dynamic source of light you will ever encounter. It offers a variety of looks without the need for any special equipment and changes throughout the day.
Here’s how to make the most of it:
1. Morning and Evening (Golden Hour)
The gentle, warm, and diffused sunlight at sunrise and dusk is ideal for landscape and portrait photography. It makes colors stand out and gives skin tones a natural glow.
2. Midday Sun (Harsh Light)
Sharp shadows on faces and backdrops can result from the harsh and bright midday sun. Learn to use it instead of avoiding it completely.
- Find open shade (like under trees or a building) for softer light.
- Use a reflector or a white wall to bounce light onto your subject.
- Experiment with silhouettes by shooting directly into the sun.
3. Cloudy Days (Soft Light)
Sunlight is uniformly dispersed by overcast clouds, which function as a massive diffuser. This produces gentle, shadowless lighting that is ideal for product, street, and portrait photography.
4. Indoor Natural Light
You can use natural light without going outside. One of the most adaptable interior light sources for photography is window light.
- Use a north- or south-facing window for consistent light.
- Diffuse harsh sunlight with a sheer curtain.
- Move your subject closer or farther from the window to control light intensity.
Understanding Artificial Light
Artificial light provides you control, wherever you are and at any time, whereas natural light is lovely and free.
Man-made light sources like lamps, LEDs, flashes, and studio lights are referred to as artificial lighting. Professional photographers who shoot at night or inside need it.
1. Continuous Lighting
You can see exactly how continuous light impacts your subject because it remains on as you photograph. Typical kinds include of:
- LED panels – energy-efficient and portable
- Ring lights – ideal for portraits and vlogs
- Softboxes – create soft, diffused light for studio shoots
2. Flash and Strobe Lighting
Short bursts of intense light are produced by flash (or strobe) lighting, which is ideal for illuminating dark situations or freezing motion.
On-camera flash: Most DSLRs and mirrorless cameras have an on-camera flash, which is useful in an emergency but might appear harsh if used directly.
Off-camera flash: Gives you more artistic freedom. For results that look natural, you can change the power, direction, and distance.
3. Mixing Natural and Artificial Light
The most skilled photographers frequently combine the two sources to provide dynamic, well-balanced lighting.
For example:
- Use a flash to fill shadows when shooting outdoors.
- Combine window light with a small LED to add a gentle highlight on your subject’s face.
Matching color temperatures is crucial since artificial lights might appear cooler or more neutral, whereas sunshine has a warmer hue. The white balance settings on your camera can be used to change this.
The Three Elements of Lighting in Photography
Three essential components are taught to students in the best photography course in order to comprehend light:
1. Direction of Light
- Front light: Soft, flattering, minimal shadows — great for portraits.
- Side light: Adds depth and texture — perfect for dramatic shots.
- Backlight: Creates silhouettes and halos — artistic and cinematic.
Try varying the subject’s orientation with respect to the light source.
2. Quality of Light
- Soft light: Diffused, gentle, and flattering — great for skin tones.
- Hard light: Sharp, contrasty, and edgy — ideal for black-and-white or fashion shots.
When necessary, soften the light with diffusers, softboxes, or even a white bedsheet.
3. Color Temperature
Measured in Kelvin (K), color temperature affects the overall tone of your image.
- Warm light (2000K–4000K): Orange-yellow tones — cozy and inviting.
- Cool light (5000K–7000K): Bluish tones — clean and modern.
To maintain natural colors, adjust the white balance on your camera to “Daylight,” “Cloudy,” or “Tungsten” based on your surroundings.
Practice Makes Perfect
Lighting is a skill that takes time to master. It involves observation, experimentation, and adaptation. Try using different light setups or taking pictures of the same subject at different times of day.
As you practice, you’ll become more aware of how reflections shift, how shadows fall, and how small lighting changes can improve your work.
Why Learning Lighting Through the Best Photography Course Helps
Although you can experiment on your own, professional instruction and systematic study are necessary to grasp light. In addition to teaching camera settings, the best photography courses teach students how to sense light.
You’ll learn:
- How to control exposure using aperture, shutter speed, and ISO
- Techniques for portrait and product lighting
- How to use reflectors, softboxes, and diffusers effectively
- Real-world projects in both indoor and outdoor lighting
- Post-processing tips to enhance light and mood in editing
When you receive practical instruction at a reputable photography institute, you will have access to expert studios, lighting equipment, and mentors who will help you along the way.
Final Thoughts
Understanding how to use light is the cornerstone of any excellent photograph. Photography is the art of capturing light. Gaining control over light allows for countless creative options, whether it’s the brilliant clarity of a studio flash or the golden glow of morning sunlight.
Consider signing up for the best photography course in Kolkata if you’re serious about getting better at taking pictures. With the correct instruction, tools, and guidance, you’ll discover how to produce light as well as catch it.


